

How To Install LEMP(Linux, Nginx, MySQL, PHP) Stack On Ubuntu 22

Senior React / Next.js Engineer, Team Lead | Web, Mobile Products
What is this LEMP stack?
What is this LEMP stack and why often use it exactly? The LEMP stack which includes the most popular and famous tools for development websites.
- Linux(L) - This is the operating system on which the other components run. Linux is a widely used open-source operating system.
- Engine-X(E) - Originally, the "E" in LEMP stood for "Engine-X," which refers to the Nginx web server. Nginx is known for its high performance and scalability, and it is commonly used as a reverse proxy server and load balancer. It can also serve static content efficiently.
- MySQL(M) - MySQL is a relational database management system (RDBMS) that is often used as the database component in the LEMP stack. It is known for its reliability and ease of use.
- PHP(P) - PHP is a server-side scripting language used for web development. It is embedded in HTML and is often used to create dynamic web pages. In the context of the LEMP stack, PHP handles server-side scripting and interacts with the MySQL database to generate dynamic content.
So, why is this stack often used?
The tools which include in this stack are very often used to make websites. For example PHP and MySQL are necessary for creating sites on WordPress.
For the record, WordPress is the most popular CMS platform in the world. Over 5 000 000 million sites built on WordPress. The statistics wappalyzer.com.
something from LEMP stack. It could be even not a CMS so just clear a project when using database MySQL and PHP. For this reason the LEMP stack is so popular, because it includes already necessary and basic tools for development.
The first step - auth SSH
First, you need to authorize on your server via SSH. Open terminal and enter this command:
1ssh root@YOUR_IP_ADDRESSAfter that you need to enter a password from your server.
The second step - Install the Nginx
Before install, you need to update packages for your server.
1sudo apt updateNow, you can install Nginx. Use this command:
1sudo apt install nginxYou'll be asked if you want to install Nginx, press Y and ENTER.
Step 3 - Firewall settings
Now, let's set up the Firewall. We recommend doing this to enhance the security of your resource. Enter this command to get a list of security profiles:
1sudo ufw app listIf you receive a response "Status: inactive", it means that your firewall is not activated. To enable it, you need to execute the following command:
1sudo ufw enableAfter executing the command "ufw app list", you will receive a list of allowed firewall profiles in response.
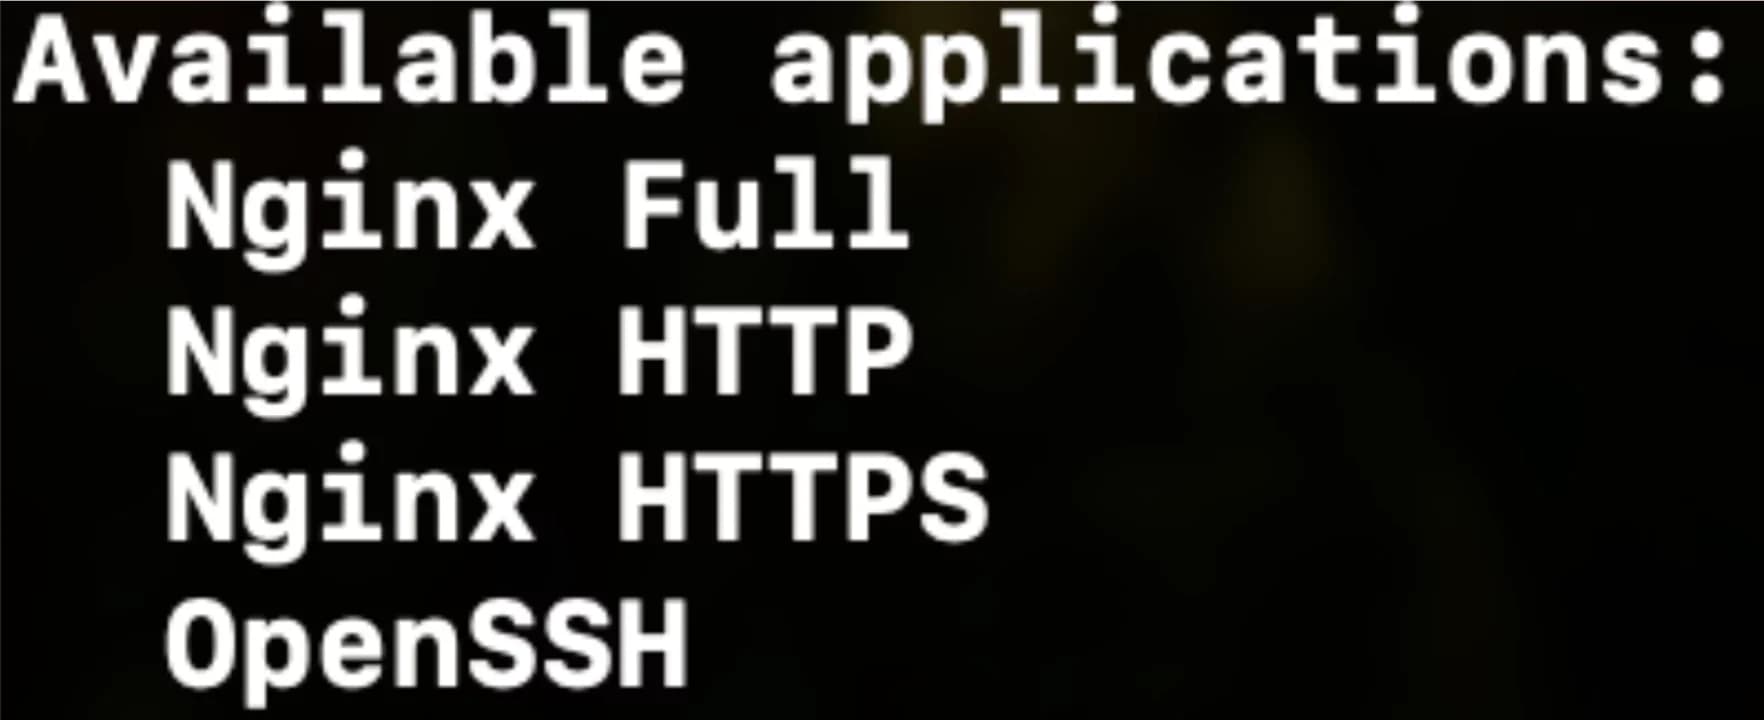 You should see something like the following.
Then, you should enable the firewall profiles.
In this instruction, we will be enabling the following profiles: Nginx HTTP, Nginx HTTPS, OpenSSH.
I recommend enabling this basic set of profiles for Nginx.
Let's go through each of them in more detail and understand what each of them is responsible for.
The Nginx HTTP profile is used to allow users to access your resource via the HTTP protocol (standard, unsecured connection). You may choose not to enable this profile if you plan to use only the HTTPS protocol. If you enable this profile, your site (http://mydomain.com) will be accessible via the HTTP protocol. However, this is not secure in the modern world, and nowadays, most sites have a secure HTTPS connection. Later in this article, we will install an SSL certificate and make certain settings, then we will perform the procedure for redirecting from HTTP to HTTPS to enhance the security of the site and completely prohibit access via the HTTP protocol.
The Nginx HTTPS profile is used to provide the ability to access your resource via the secure HTTPS connection protocol. As mentioned earlier, today, virtually every site has a secure connection, and we strongly recommend enabling this profile.
OpenSSH allows remote users to connect to your server via the SSH protocol. SSH provides a secure connection through encryption to a remote server, making the data transfer between your computer and the server reliable and protected from eavesdropping.
So, let's execute the following command:
1sudo ufw allow 'Nginx HTTP'; sudo ufw allow 'Nginx HTTPS'; sudo ufw allow OpenSSHAfter that, we can execute this command and see the list of allowed profiles:
1sudo ufw status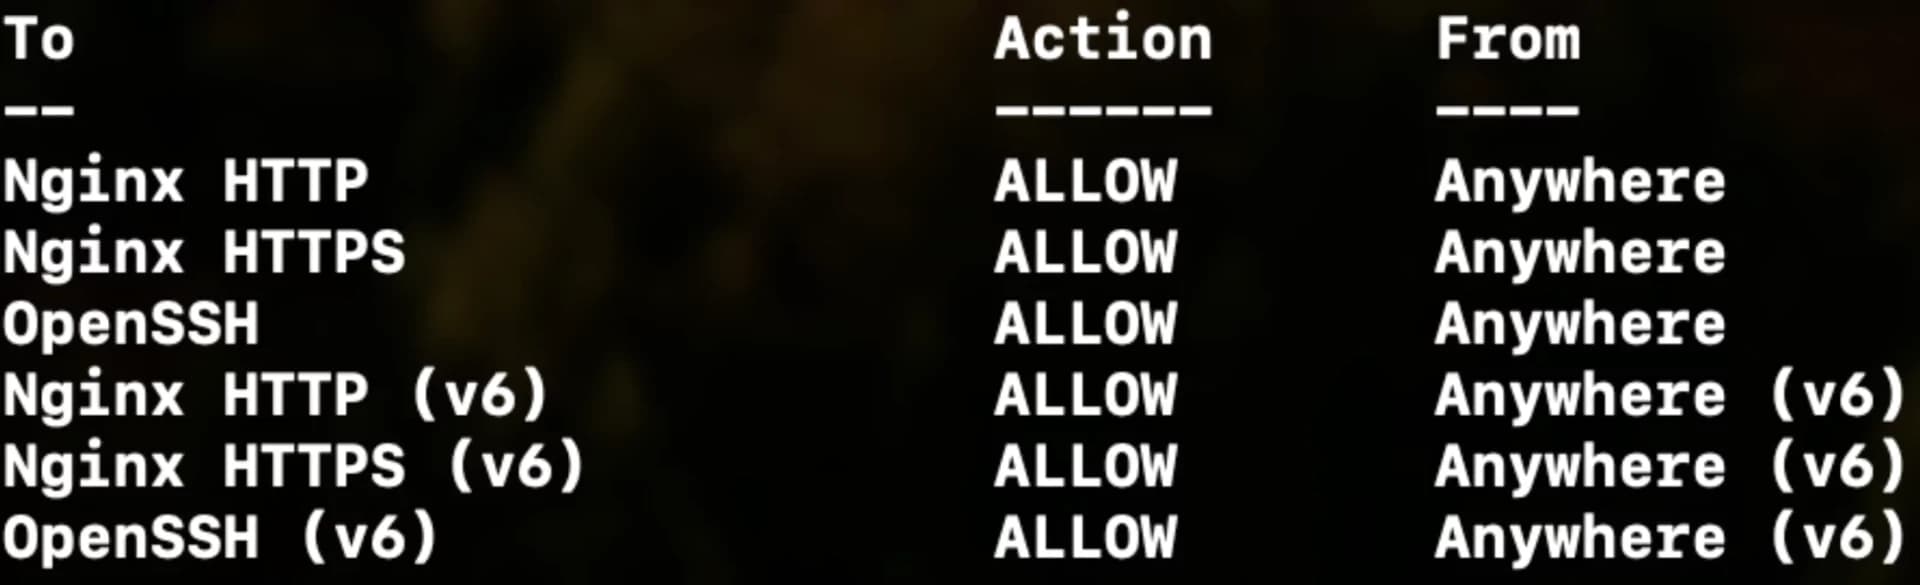 This is approximately how the list of allowed profiles will look for you.
Step 4 - Nginx test
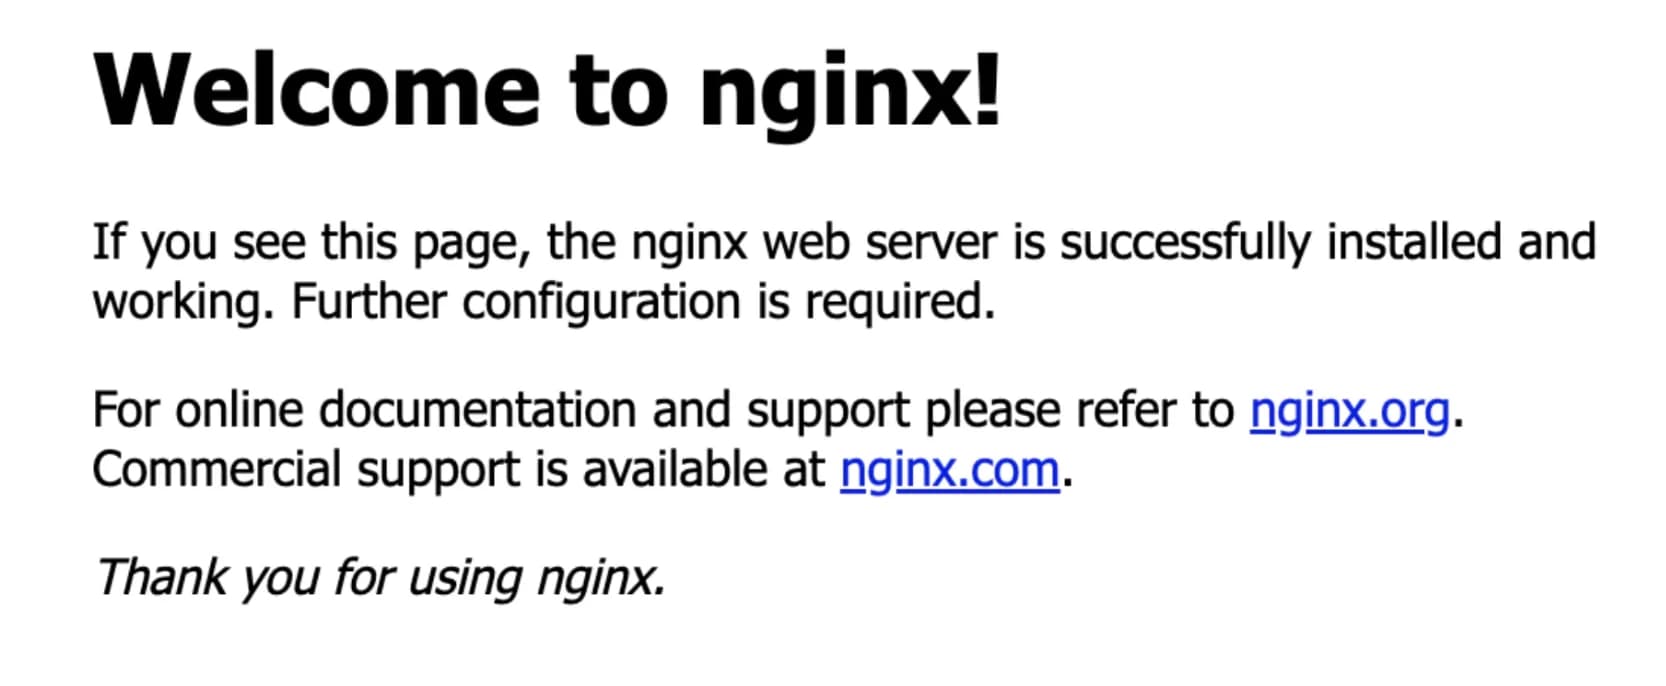
Now, you can navigate to your IP address (http://ip/) or domain (http://mydomain.com/) to check the operation of Nginx.
If you have done everything correctly, you will see the following:
Step 5 - MySQL install and settings
For working with a website, we may need a database to work with organized data, having the ability to store, retrieve, write, or delete when necessary. MySQL, one of the most popular databases for working with PHP queries, will help us with this.
To install MySQL on your server, execute the following command: sudo apt install mysql-server.
During the installation process, you will need to press Y, then ENTER.
Upon completion of the installation, it is recommended to run the security script pre-installed in MySQL. This script will remove certain default settings that pose potential security threats and enhance the protection of your database access. Run the interactive script using the following command:
1sudo mysql_secure_installationYou will receive a prompt asking if you wish to activate the VALIDATE PASSWORD PLUGIN.
If you confirm your desire to configure the VALIDATE PASSWORD PLUGIN, you will be prompted to choose the password complexity validation level. It is important to note that setting the highest level (2) will result in errors when attempting to set a password that does not meet the requirements, including digits, uppercase and lowercase letters, as well as special characters. Regardless of whether you decide to enable the VALIDATE PASSWORD PLUGIN, the system will prompt you to set and confirm a password for the MySQL root user. It is important to note that this user should not be confused with the system root. The MySQL root user has full privileges within the database system. Although by default, the MySQL root user does not require a password for authentication, it is recommended to create a strong password for an additional level of security. If you have enabled password validation, the server will display the strength rating of your entered root password and ask if you want to keep it. If the current password suits you, confirm your choice by entering "Y" at the command prompt.
To respond to the remaining prompts, press "Y" and then the "Enter" key for each confirmation. This will result in the removal of some anonymous users and the test database, as well as disabling remote access to the root account.
Afterward, the new settings will be loaded so MySQL can immediately apply the changes you've made. Upon completion of this process, check if you can log in to the MySQL console.
1sudo mysql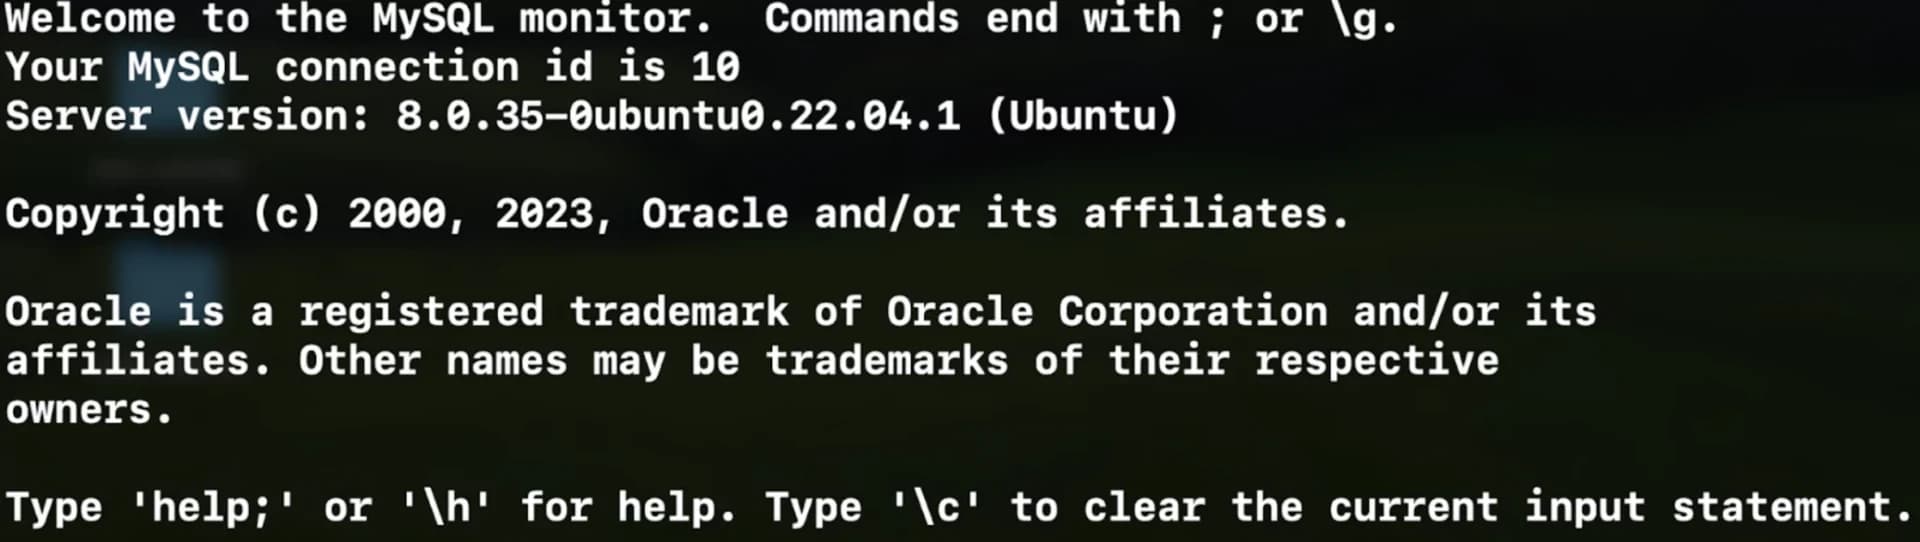
To exit the MySQL console, enter the following command: exit
It is important to note that when logging into MySQL as the root user on Ubuntu, no password is required, even if you have set one during the execution of the mysql_secure_installation script. This is because Ubuntu by default uses the auth_socket authentication method for the MySQL administrative user, instead of the method that requires a password.
At first glance, this may seem like a security concern. However, this approach enhances the security of the database server because logging in as the MySQL root user is only allowed for system users with sudo privilege, connecting from the console or through an application operating with the same privileges. In this case, limited access to administrative functions is ensured.
To enhance security, it is recommended to create separate user accounts with more limited privileges for each database, especially if your server hosts multiple databases.
Step 6 - PHP install
You already have Nginx set up to serve content and MySQL to store and manage data. Now, you need to install PHP to handle code execution and create dynamic content for the web server.
Unlike Apache, which embeds the PHP interpreter in each request, Nginx requires the use of an external program to process PHP. This program acts as a bridge between the PHP interpreter and the web server, providing higher performance for most PHP-based websites. However, this requires additional configuration. You need to install php8.1-fpm, which stands for "PHP FastCGI Process Manager". It uses the latest version of PHP (at the time of writing) and instructs Nginx to forward requests to PHP for processing by this software. Additionally, you'll need php-mysql - a PHP module that allows PHP to interact with MySQL databases. The core PHP packages will be installed automatically as dependencies.
To install the php8.1-fpm and php-mysql packages, execute the following command:
1sudo apt install php8.1-fpm php-mysqlPress "Y" and then press the "Enter" key to confirm.
Great, now let's proceed with configuring the Nginx configuration and website directory.
Step 7 - PHP settings and create directory for a site
In Ubuntu 22.04, Nginx by default activates a single server block and is configured to serve documents from the directory located at /var/www/html. While this is convenient for a single site, managing multiple sites can be challenging. Instead of modifying /var/www/html, we suggest creating a directory structure under /var/www for your website "your_domain", while retaining /var/www/html as the default directory to serve requests that do not match other sites.
To create the root web directory for your domain "your_domain," follow these steps:
1sudo mkdir /var/www/your_domainAfter that, specify the owner of the directory using the environment variable $USER, which will point to your current system user:
1sudo chown -R $USER:$USER /var/www/your_domainThen open a new configuration file in the Nginx sites-available directory using any text editor you prefer from the command line. In this case, we'll use nano:
1sudo nano /etc/nginx/sites-available/your_domainThis will create a new file without any content. Paste the following basic configuration:
1server {
2    listen 80;
3    server_name your_domain www.your_domain;
4    root /var/www/your_domain;
5
6    index index.html index.htm index.php;
7
8    location / {
9        try_files $uri $uri/ =404;
10    }
11
12    location ~ \.php$ {
13        include snippets/fastcgi-php.conf;
14        fastcgi_pass unix:/run/php/php8.1-fpm.sock;
15     }
16
17    location ~ /\.ht {
18        deny all;
19    }
20}
Let's analyze each element.
- "listen" — Specifies the port on which Nginx will listen for incoming connections. In this case, port 80 is set, which is the standard port for HTTP.
- "root" — Sets the root directory where the files served by this website are stored.
- "index" — Defines the priority of index files for this website. Typically, index.html files have higher priority over index.php, ensuring a quick loading of the landing page in PHP applications. These parameters can be configured according to the requirements of your application.
- "server_name" — Specifies the domain names and/or IP addresses to which this server block should respond.
- "location /" — The first location block includes the try_files directive, which checks for the existence of files or directories matching the URL request. If no suitable resource is found, Nginx will return a 404 error.
- "location ~ .php$" — This location block handles PHP processing by directing Nginx to the fastcgi-php.conf configuration file and the php8.1-fpm.sock file, which specifies the associated socket with php8.1-fpm.
- location ~ /\.ht — The last location block pertains to .htaccess files, which are not processed by Nginx. By adding the deny all directive, if any .htaccess files end up in the document root, they will not be served to visitors.
After finishing the editing, save and close the file. If you're using nano, do this by pressing CTRL+X, then Y, and finally ENTER to confirm. To activate your configuration, link to the configuration file in the Nginx sites-enabled directory.
1sudo ln -s /etc/nginx/sites-available/your_domain /etc/nginx/sites-enabled/Afterward, remove the default configuration file link from the /sites-enabled/ directory.
1sudo unlink /etc/nginx/sites-enabled/defaultIf you ever need to restore the default configuration, you can do so by creating a new symbolic link, following the instructions below:
1sudo ln -s /etc/nginx/sites-available/default /etc/nginx/sites-enabled/Now, let's check for syntax errors and then reload our Nginx server:
1sudo nginx -t  You should see this. This means everything is fine.
If everything is okay, let's reload Nginx to apply all our changes:
1sudo systemctl reload nginxYour new website is activated, but the default folder still doesn't contain any files. To ensure that your new server block is working correctly, create a file in the root of your website: /var/www/your_domain/index.html
1nano /var/www/your_domain/index.htmlPaste this into the file:
1<!DOCTYPE html>
2<html lang="en">
3<head>
4    <meta charset="UTF-8">
5    <meta name="viewport" content="width=device-width, initial-scale=1.0">
6    <title>Document</title>
7</head>
8<body>
9    <h1>Hello World!</h1>
10    <p>This is my page.</p>
11</body>
12</html>
You should see this when you visit your domain.
 If you received this, it means you've done everything correctly and everything is working!
You can leave this file as a temporary landing page for your application until you create an index.php file to replace it. Once you do that, don't forget to remove or rename the index.html file from the root of your document, as index.php will take precedence over it by default. Now your LEMP stack is fully configured. On the next step, you will create a PHP script to verify if Nginx can indeed handle .php files on your newly set up website.
Step 8 - PHP test
It's time to test the PHP functionality. To do this, let's follow some simple steps. Create a PHP file in the directory of your domain:
1nano /var/www/your_domain/info.phpInternal document insert this:
1<?php phpinfo();Now, try to visit this address (http://mydomain/info.php), and you will see all the settings of your server.
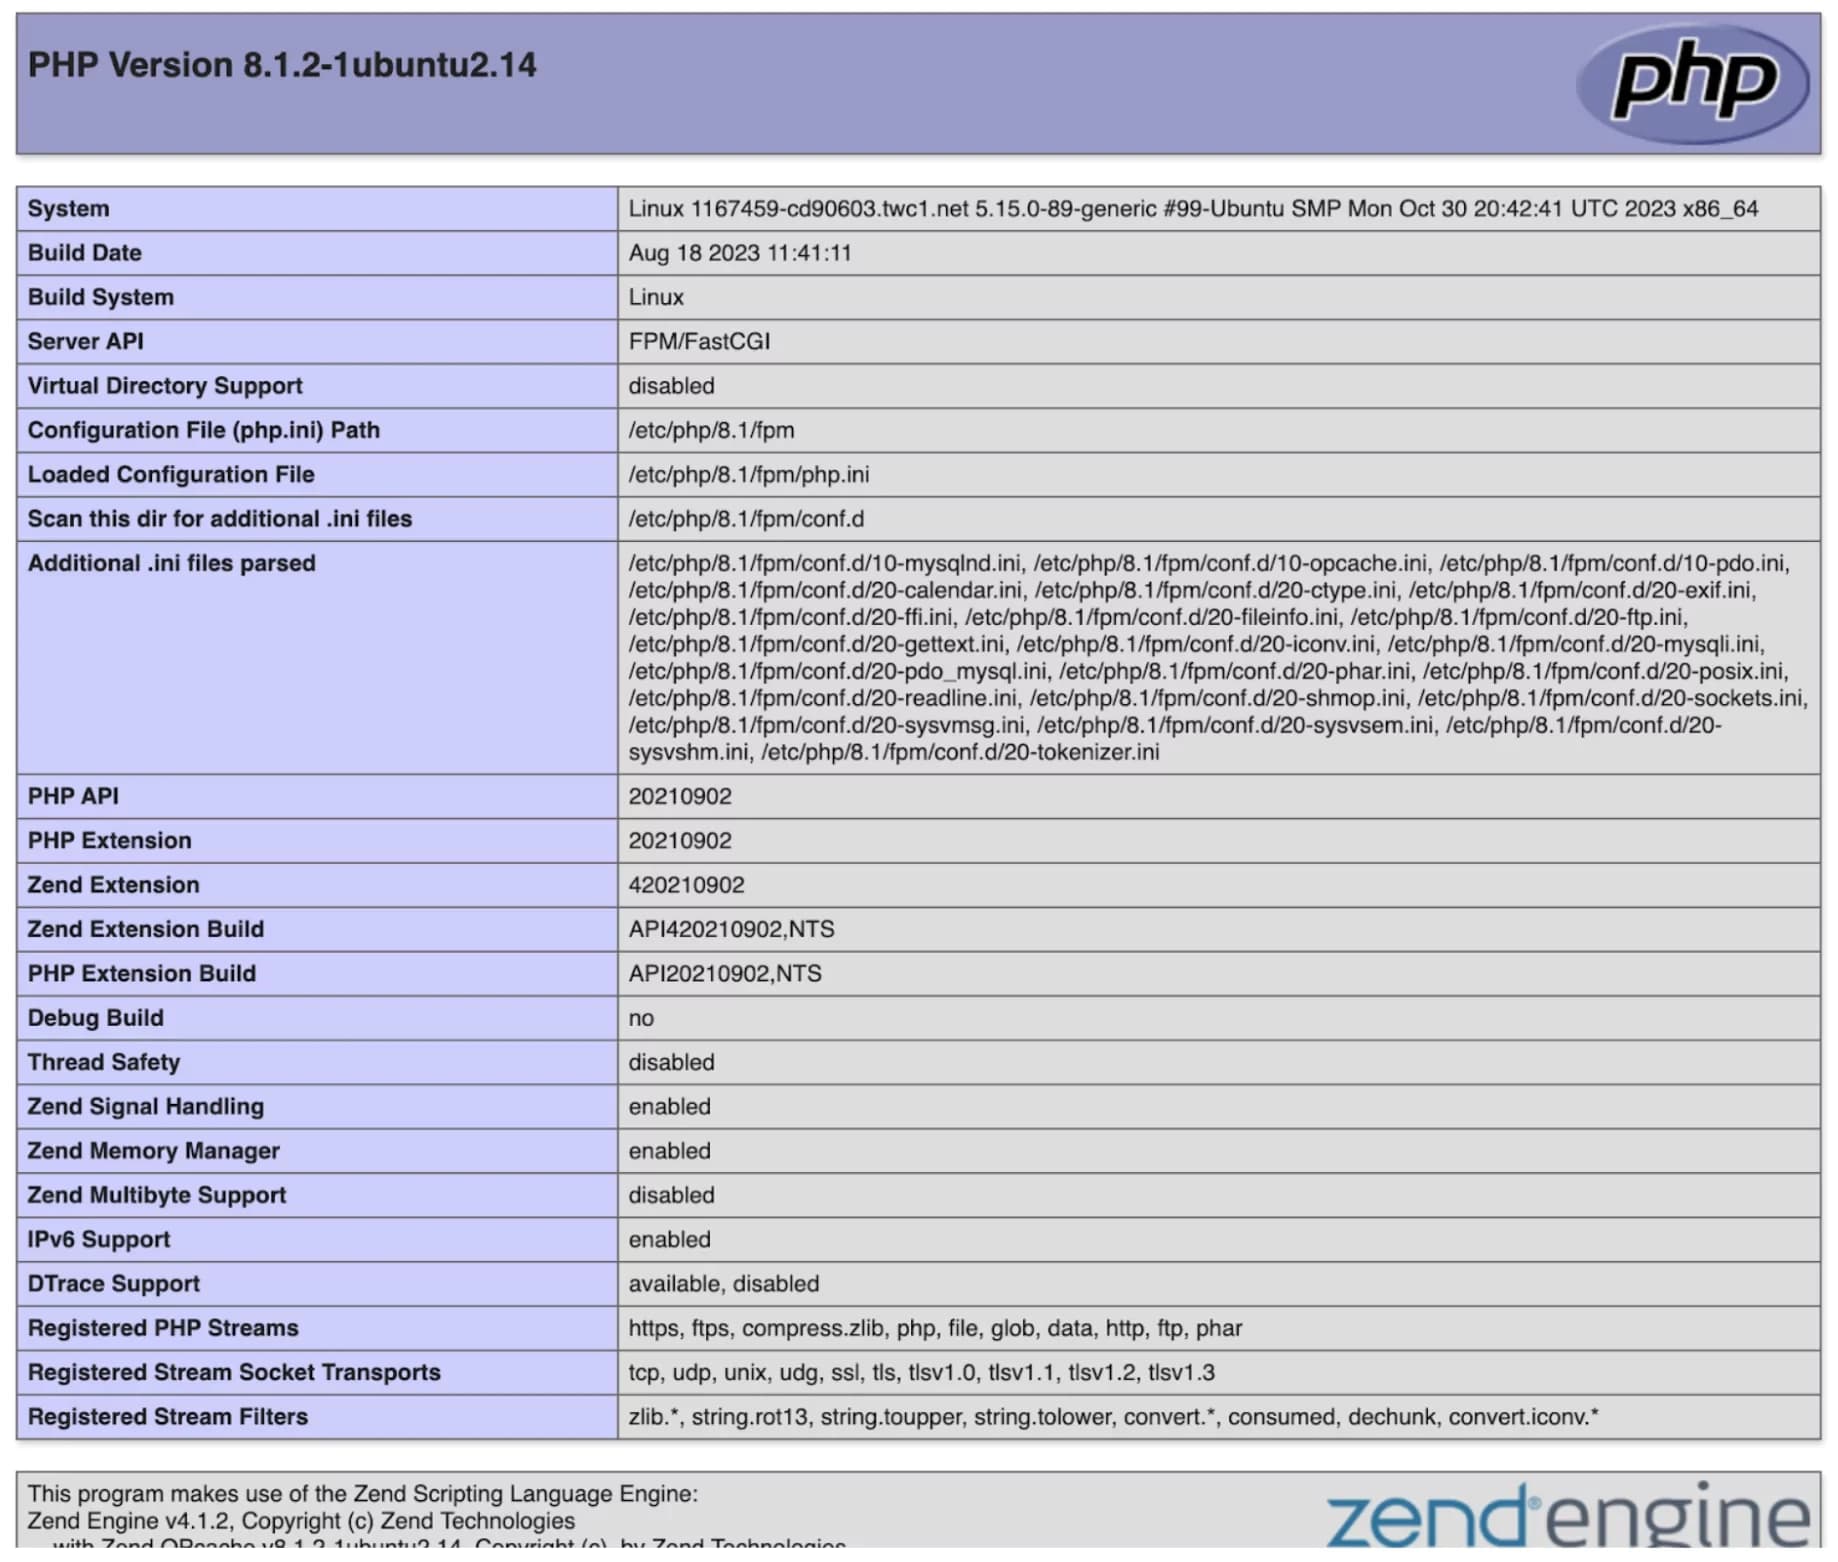
Afterwards, delete this file using the following command:
1sudo rm /var/www/your_domain/info.phpStep 9 - SSL install
At this step, we will install and configure our SSL certificate using the CertBot service. Alternatively, you can install your own SSL certificate purchased earlier. Instructions on how to do this can be found in our article.
In this article, we will use the CertBot service to install a free SSL certificate for our domain.
To do this, go to their website: https://certbot.eff.org/
Then, select your configuration. In our case, it's Nginx + Ubuntu 20+.
Afterwards, follow the instructions on their website. However, for convenience, we will describe the process.
Installing snap on Ubuntu
On the left side, select Ubuntu. Then, execute these commands:
1sudo apt update1sudo apt install snapdNext, let's install CertBot itself, assuming you haven't installed it before.
Execute this command:
1sudo snap install --classic certbotThen, execute this command to ensure that CertBot is working:
1sudo ln -s /snap/bin/certbot /usr/bin/certbotNow, let's run the command that will issue the SSL certificate and add the necessary records to the server configuration of our domain.
1sudo certbot --nginxYou will be prompted to enter your email. Then, answer the questions accordingly.
1 - Agree to the terms.
2 - Do you want to share your email with the creators of Certbot and receive news?
3 - You will be asked for which domains you would like to install SSL. Choose all or one of the domains you would like. If you just press Enter, SSL will be installed on all domains.
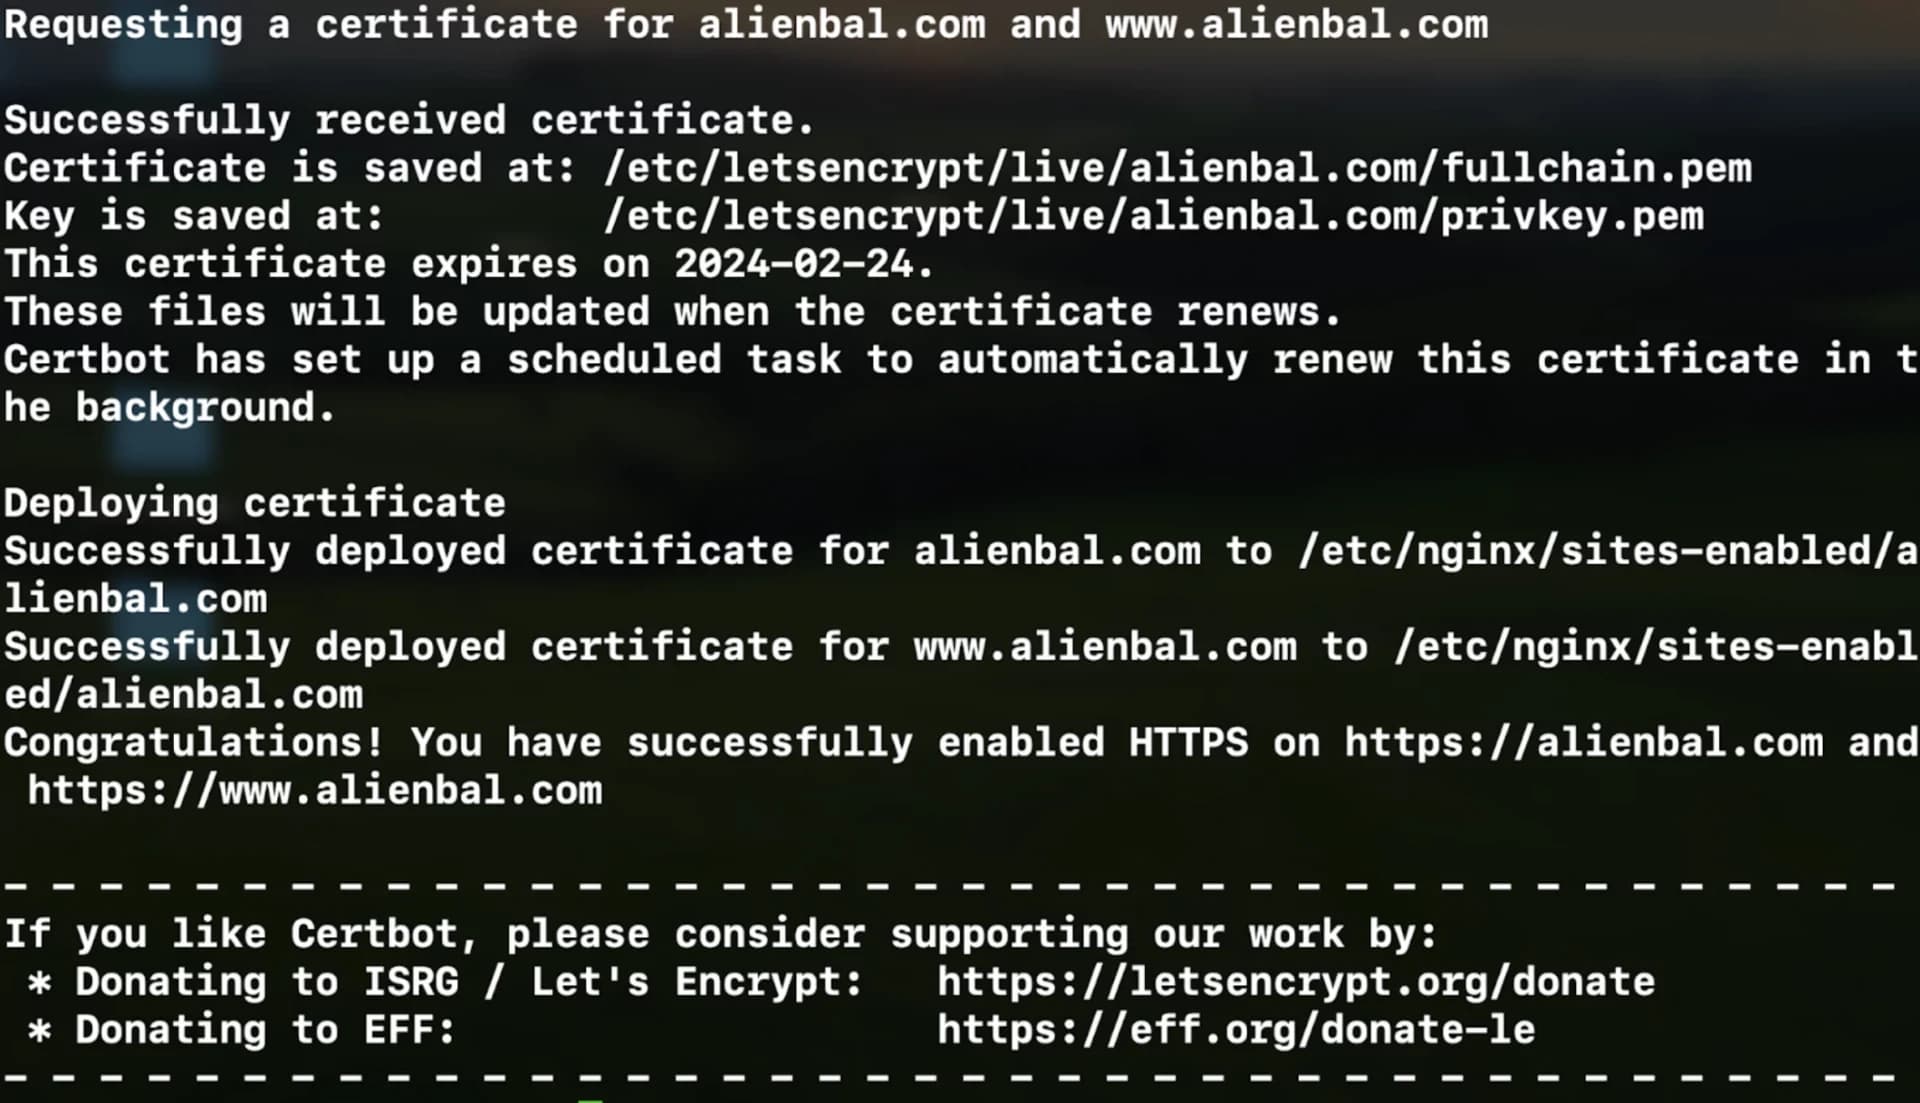 If everything went successfully, you will see the following.
Now, you can visit your domain and check the SSL functionality. We recommend using incognito mode or clearing your cache.
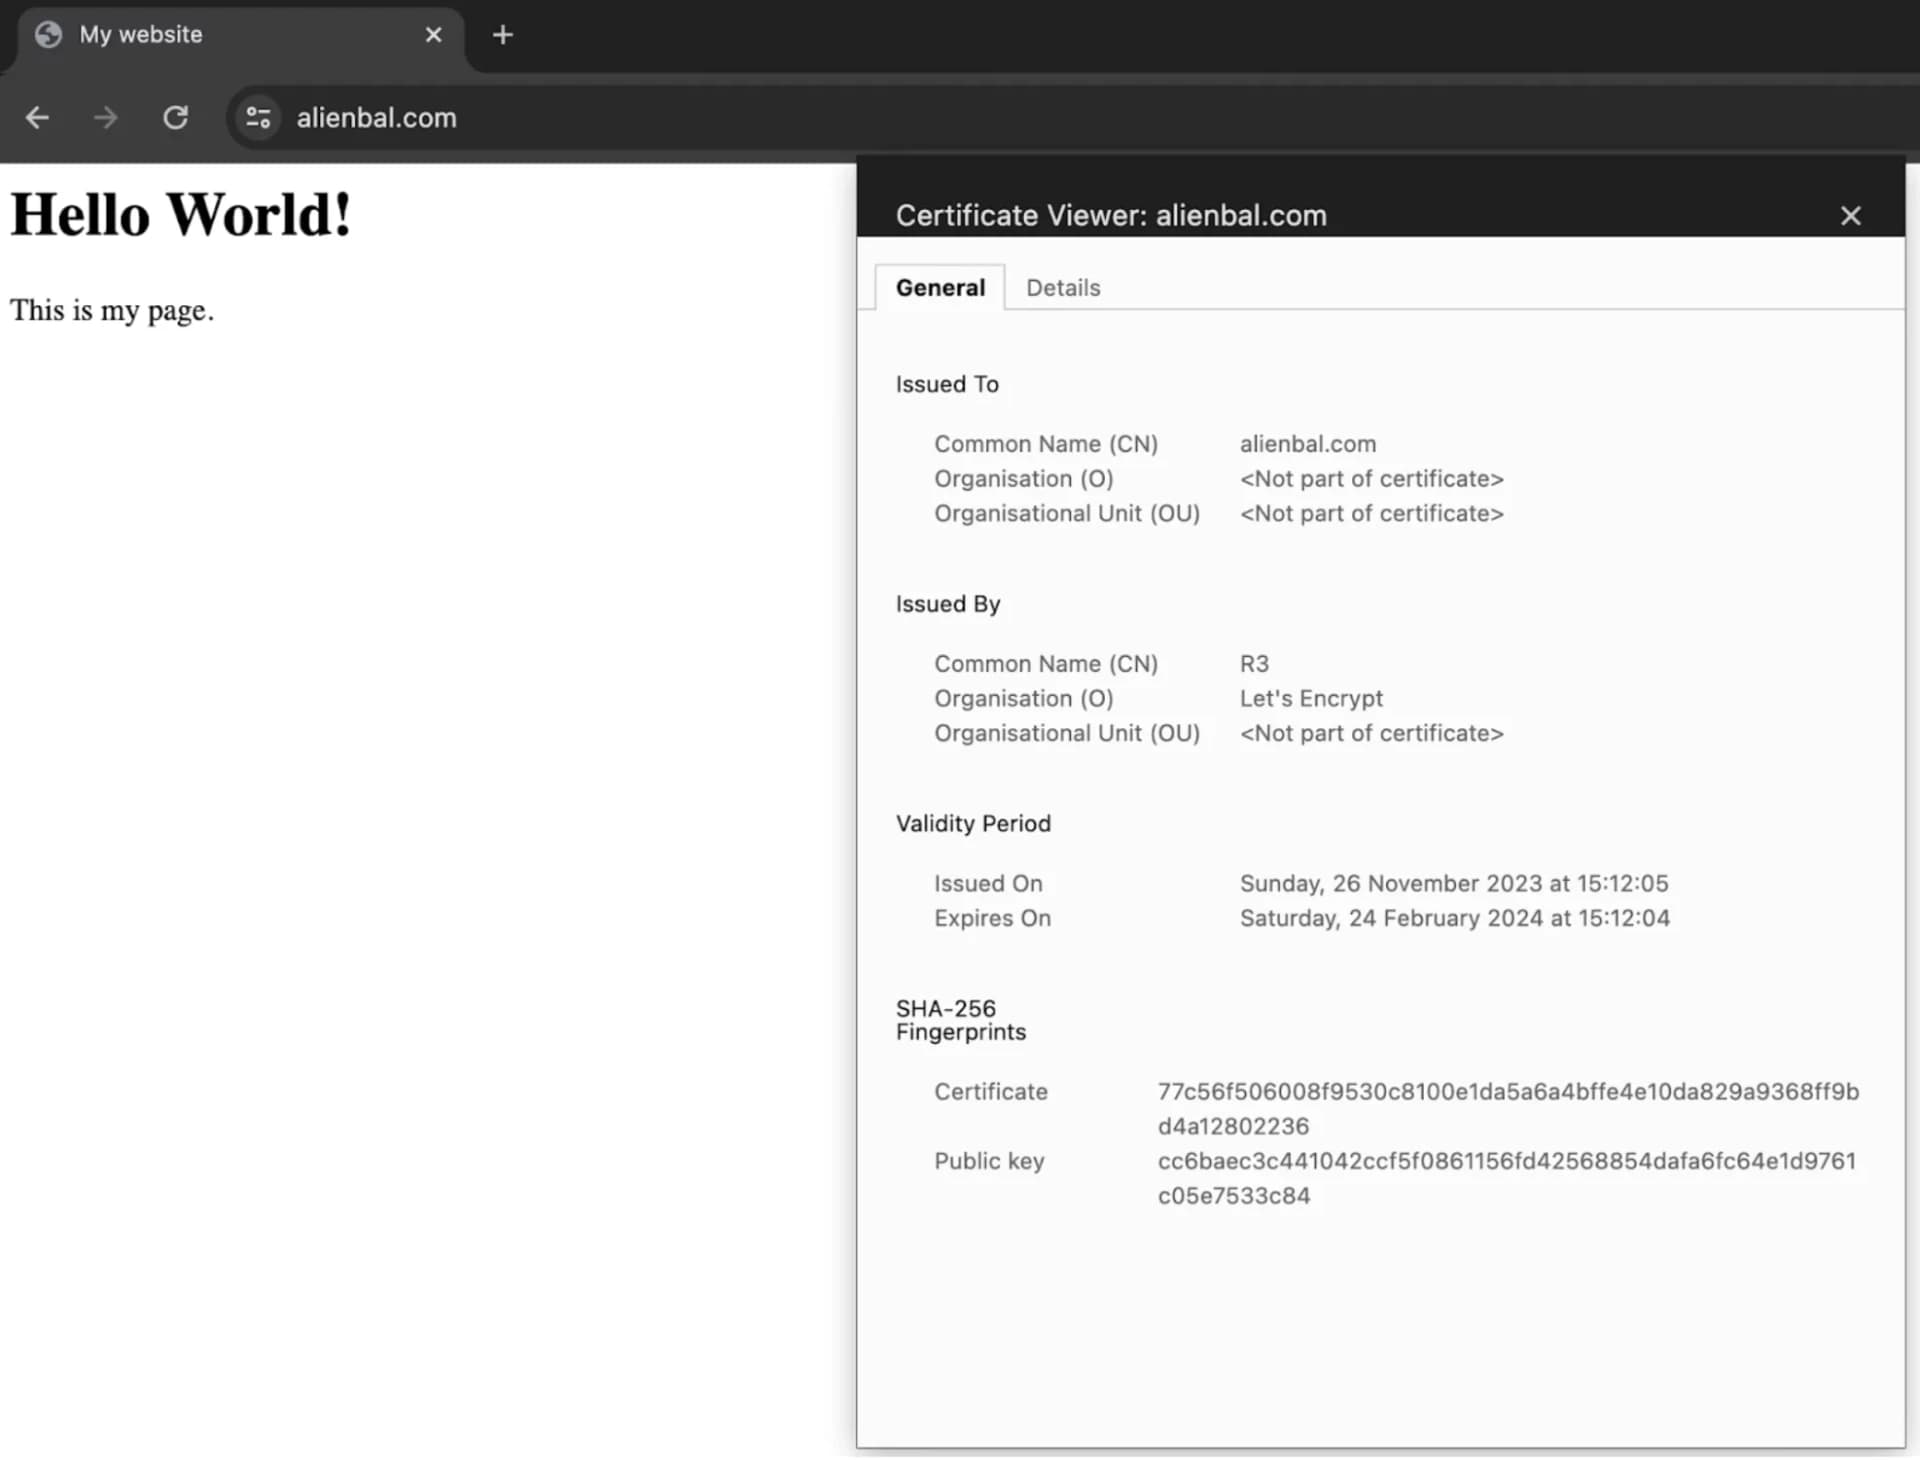 Check the SSL functionality
Also, if we navigate to the domain's configuration file, we will see that additional entries have been added. Exit to the server's root directory by typing:
1cd ..Next
1cd etc/nginx/sites-avaliable/ && nano your_domainCongratulations, everything is now set up! You have successfully configured your server, and everything is working correctly.